Flyin Menu Plugin Documentation
Description
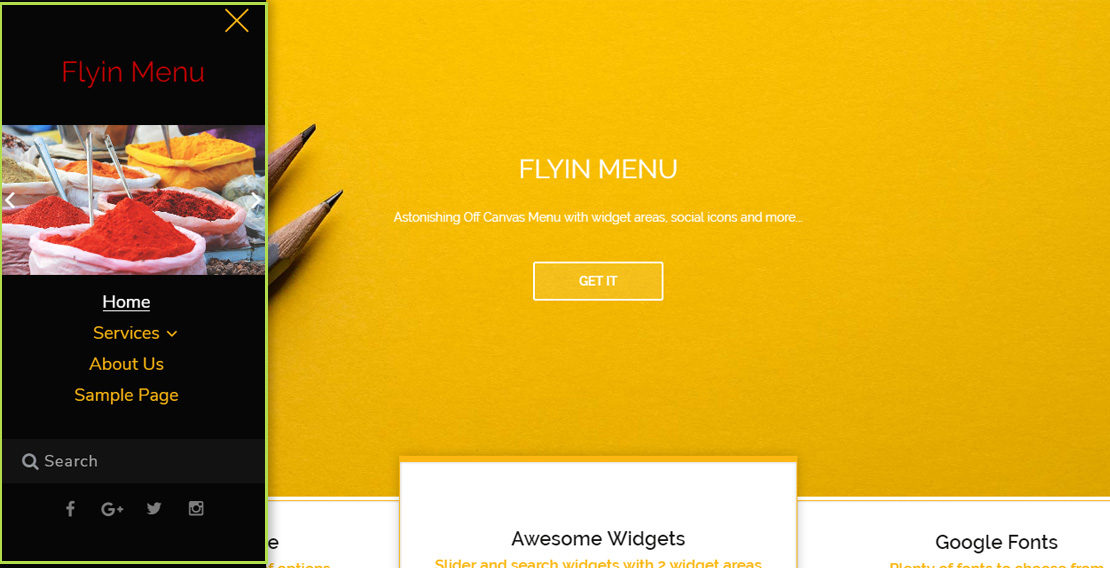
Astonishing Off Canvas Menu with widget areas, social icons and much more. It is very easy to setup, in less than 5 minutes, but under the hood there are lots of options, and animations to make it more beautiful. With out of the box search and slider widgets, possiability to enable social icons at the bottom, and additional top / bottom widget areas it is an excellent solution for boosting up of existing theme menu. Coded by professionals and with latest SCSS technology.
You can obtain Flyin Menu from Envato Market:
Installing Flyin Menu plugin
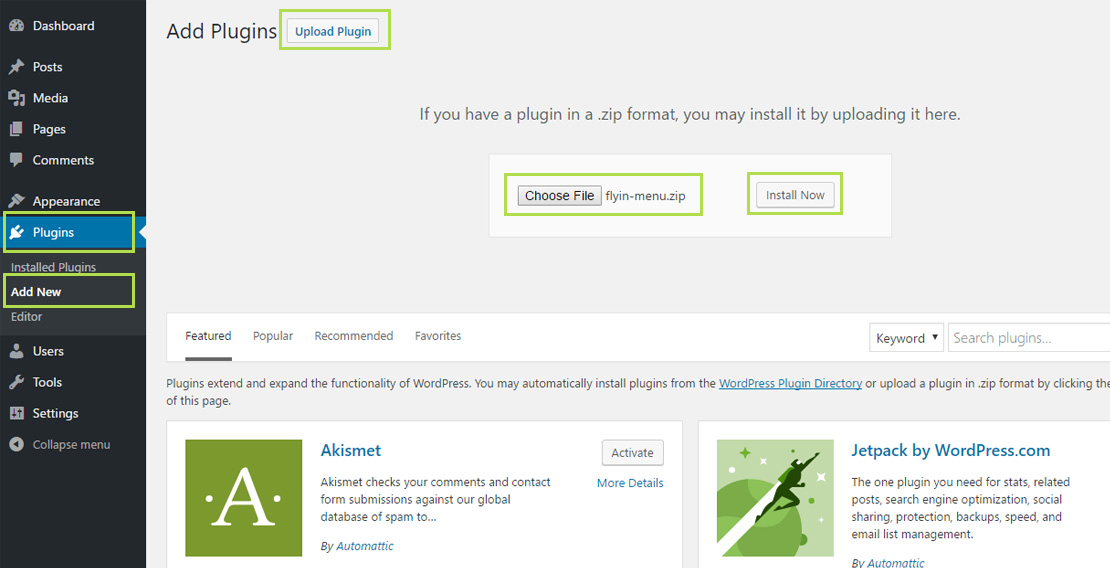
After donwloading installation from codecanyon.net in order to install the plugin, from WordPress back end, navigate to Plugins > Add New, and then click on Upload Plugin and select downloaded installation .zip file and finally click on Install Now:
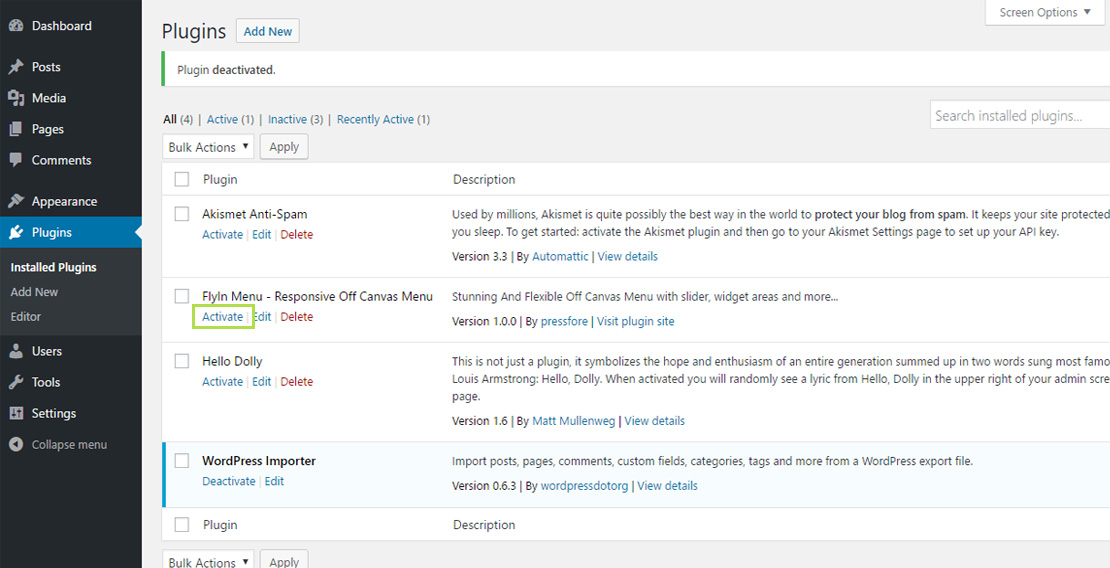
After installation, Activate plugin.
Note: In case that you have downloaded compleate installation with documnetation, then first unzip downloaded .zip arhive file in order to install flyin-menu.zip. If you try to install .zip file which contain both plugin installation and documentation, installation will fail.
Flyin Menu Integration
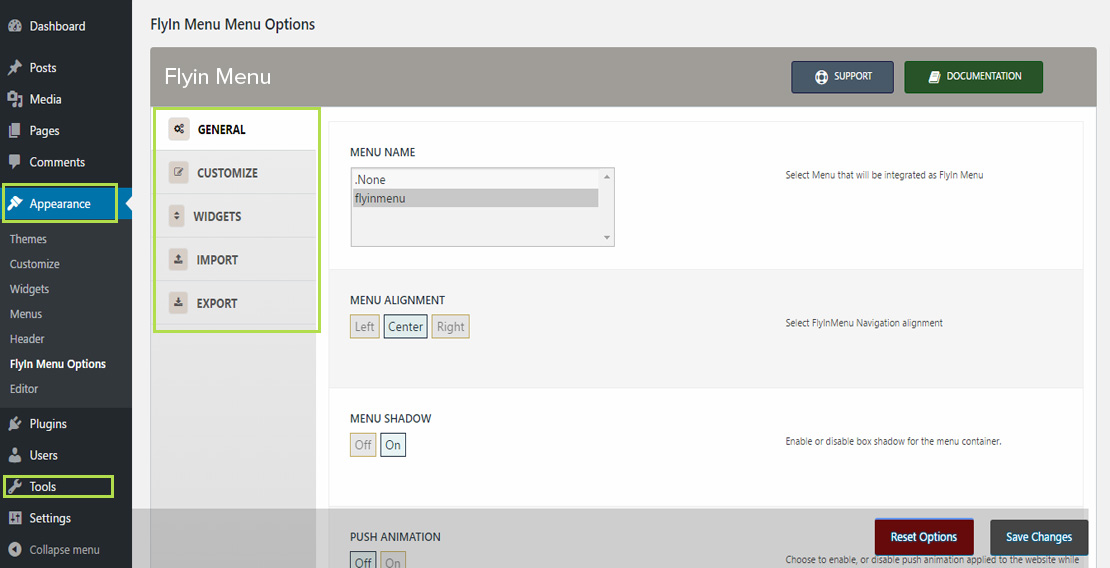
When Flyin menu is actiavted and configured, default theme menu will be replaced with Hamburger Menu icon which wil reveal off canvas menu on click, or you can replace several menus, so if you decide to use some other menu, it will also use Flyin Menu Off Canvas layout. In order to set it up, you first need to assign one of your menus to one of theme predefined menu locations. Navigate to Appereance > Flyin Menu Options > General, and select one of your menus, or create a new one, assign it to menu location and finally Save Changes.
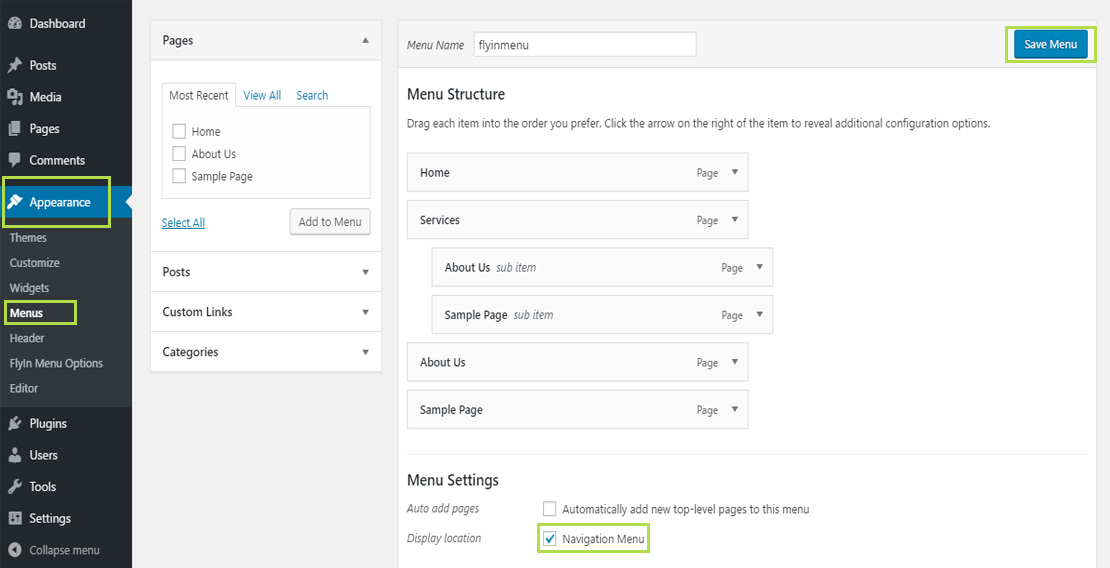
Finally navigate to Appereance > Flyin Menu Options > General, previously assigned menu, or select multiple menus with Ctrl + Click method, and then Save Changes.

With these few steps, menu is ready to be used, and it will be displayed instead of default theme menu.
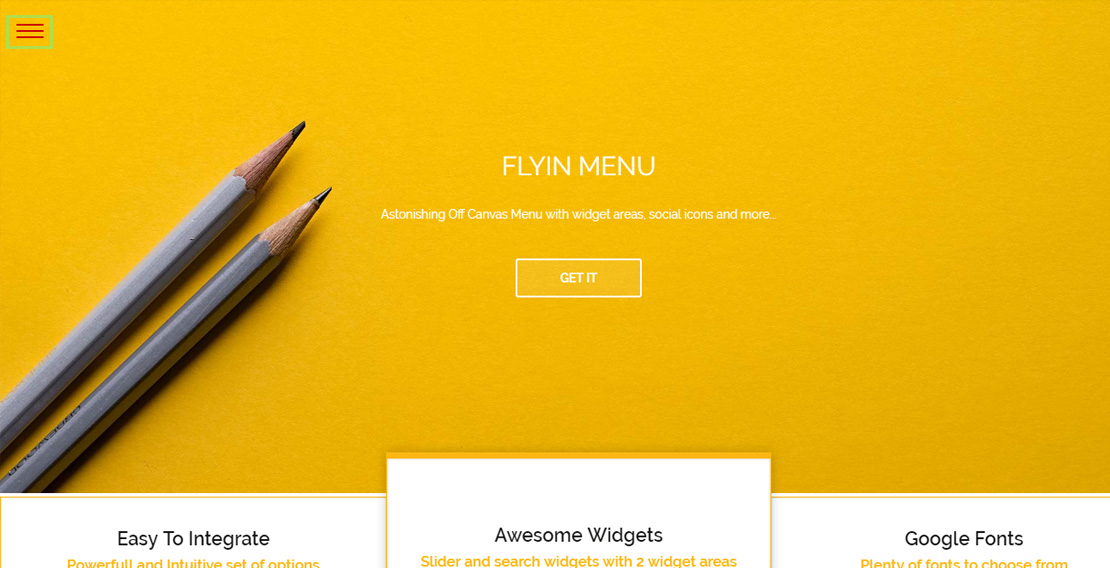
Clicking on Hamburger menu will open Flyin Menu.
In few steps eabove, you saw a glimpse of Flyin Menu options, and we will cover all of them in following chapter.
Manual Integration
Note: For manual integration, user will need to possess intermediate coding knowledge.
Usage:
<?php flyinmenu_manual($args); ?>Default arguments:
$args = array(
   'theme_location' => '',
   'menu' => ''
);
Parameters:
'menu'Required - Pass selected menu to this argument so you can initialize Flyin Menu for it. If you do not pass 'menu' argument, Flyin Menu will call menu which was created first.
'theme_location'Optional - You can pass the theme location if you want, but it is not mandatory, and Flyin Menu requires only 'menu' argument in order to initialize it for the selected menu.
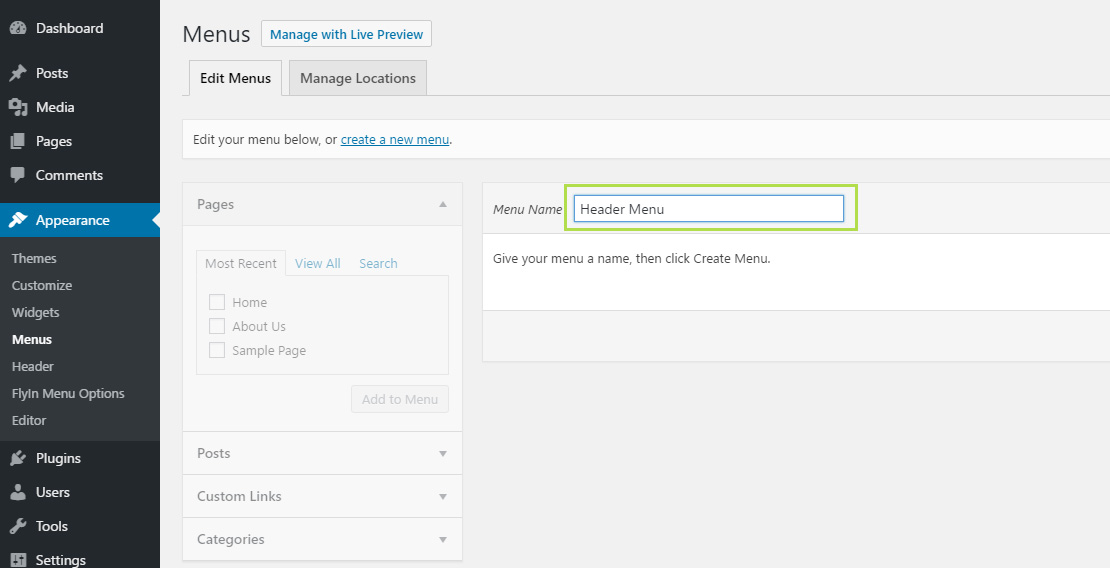
To find the menu you want to integrate go to Appearence > Menus. Edit existing menu, or create new. When done, copy the Menu Name, and then pass it to the 'menu' argument when calling Flyin Menu.
Then go to theme files (usually header.php) and paste integration function where you want it.
Example:
<?php
  //pass the selected menu to the arguments array (In this example I will be using Header Menu)
  $args = array( 'menu' => 'Header Menu' );

  //call Flyin Menu
  flyinmenu_manual($args);
?>
Flyin Menu Options
You can access Flyin Menu Options from Appereance > Flyin Menu Options. While there, you will see several tabs on the left and accessing each one will reveal several set of opstions.
Note: For each option which is expecting value, line margin, padding, font size, you just need to type value in. Do not add px at the end unless instructed differently by option description.
All options are self explanatory, but we will list and cover them briefly for each option tab.
GENERAL
| Name | Description |
|---|---|
| MENU NAME | Select Menu that will be integrated as FlyIn Menu. |
| MENU ALIGNMENT | Select FlyInMenu Navigation alignment |
| MENU SHADOW | Enable or disable box shadow for the menu container. |
| PUSH ANIMATION | Choose to enable, or disable push animation applied to the website while menu is entering from the side. |
| ENTRANCE ANIMATION DURATION | Enter the duration of the entrance animation. Value will be calculated in milliseconds. |
| SUBMENU ELEMENTS ANIMATION | Choose to enable, or disable submenu menu items appear animation once menu is opened. |
| LOGO, Text, Text Color, Text size | Upload your logo image, or choose to display text as logo. Image will have priority over text, so if you want to display text, you need to make sure that no image is added, or remove one is set. |
| BUTTON, Button Layout, Button Color, Close Button Color, Button Top Offset, Button Side Offset | Set button layout, text and color. |
| MENU POSITION | Select the position of the FlyinMenu menu. Choose either to place to the left side, or right side of the screen. |
CUSTOMIZE
| Name | Description |
|---|---|
| FLYINMENU MENU WIDTH | Edit FlyInMenu menu width. Value will be calculated in px. Only number input is allowed. |
| FLYIN MENU WIDTH ON MOBILE DEVICES | Edit FlyInMenu menu max width on mobile devices. |
| LOGO STYLING, Width, Height, Position From Top | Customize your logo, set it margins and width and height properties. |
| MENU BACKGROUND, BG color, BG image, position, size | Select Menu background color, or image. If image and color are used the background image will be visible, as it holds priority over color. For Background size you can enter cover, contain or custom value for width and height. For background position enter position for x and y axis. |
| MENU NAVIGATION TOP MARGIN | Set the top margin for the main menu. |
| MENU TEXT, Font size, Line Height | Change Main font and font-size of FlyInMenu menu. |
| MENU TEXT TRANSFORM | Select menu text transform. |
| TEXT PADDING, Top, Bottm, Left, Right | Edit text padding of FlyInMenu menu. |
| TEXT MARGIN, Top, Bottm, Left, Right | Edit text margin of FlyInMenu menu. |
| MENU ITEMS STYLES, Text color, Hover color | Change menu elements style when user hovers them with the mouse. |
| SUBMENU TEXT, Font Stize, Line Height, Text Transform | Change submenu font and font-size. |
| SUBMENUS STYLES, Text color, Hover color, Dropdown Animation Speed, Dropdown Open/Close Trigger | Change submenus text font-size, color and line height. |
| CUSTOM CSS | Add custom CSS that will be applied to FlyInMenu menu. |
WIDGETS
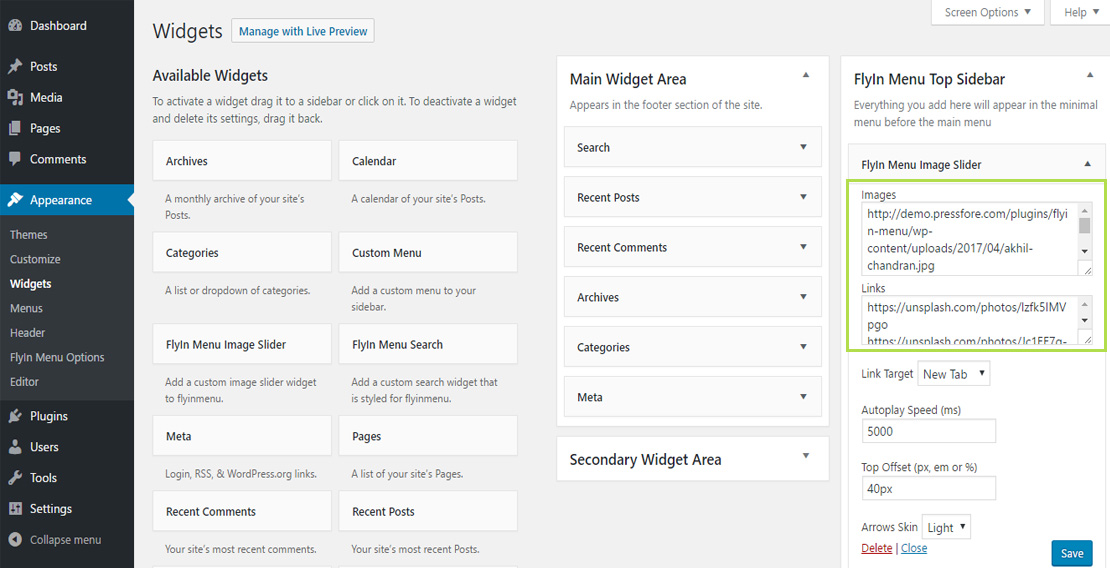
Flyin Menu have two widget areas, Flyin Menu Top Sidebar and Flyin Menu Bottom Sidebar. Placing widgets inside these widget areas will disaply widgets at the top or bottom of Flyin Menu. You can access them from Appearance > Widgets.
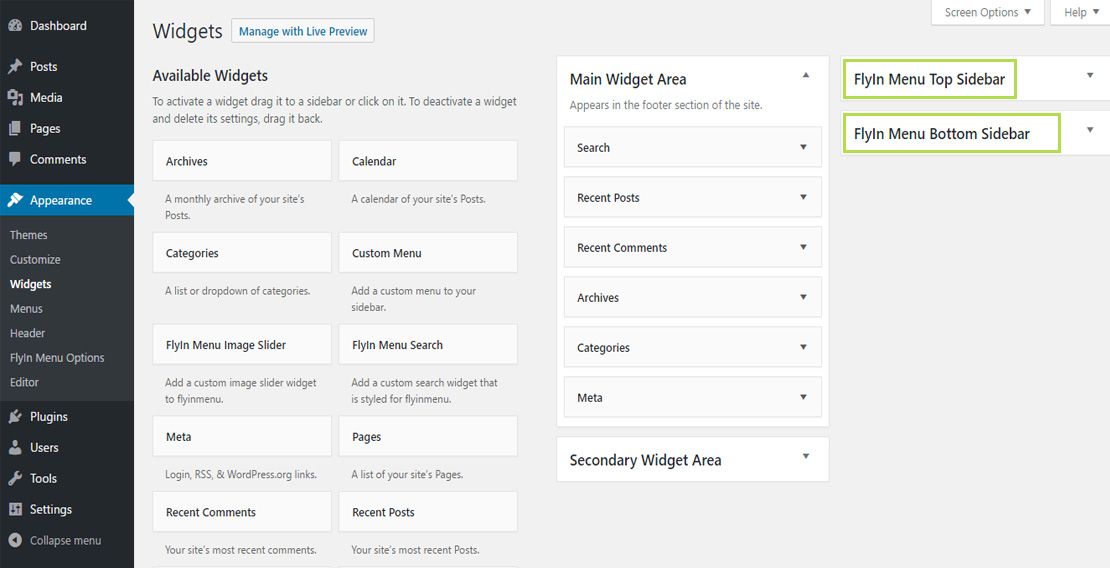
Beside these two widget areas for some custom content, there are also two widgets which comes with Flyin Menu, and these are Flyin Menu Search and Flyin Menu Image Slider. Options for these widgets are self explanatory, and only specific which we have to point out is that when you are adding images, and links into corresponding boxes, you need to separate each input by hitting enter.
| Name | Description |
|---|---|
| WIDGET TEXT, Font Size, Line Height, Titles Color, Text Color | Change widget text font-size, color and line height. |
| AFTER BOTTOM WIDGET LINKS, Displayed In After Menu Widget, Display Links | Choose to display social links, or login/logut and register links. Those links will be displayed at the bottom of after menu widget area. |
| SOCIAL LINKS TOP OFFSET | Change social links area top offset. You can enter value in px, em or %. |
| SOCIAL LINK COLOR | Select link color for social icons or login/log out links. |
| SOCIAL LINKS, Facebook, Google+, Twitter, Instagram | Add Social links to the bottom of after menu widget area. |
IMPORT and EXPORT
These options allows your to export current settings and to import them later on.
Credits
List of the resources used with Flyin Menu WordPress plugin:
Copyright
Copyright © 2017 Pressfore